Popular Post
Showing posts with label free tutorials. Show all posts

Tuesday, December 21, 2010

Kid Craft from Zakka Life

I am a very big fan of Jessica Okui who creates original craft projects and tutorials every week on Zakka Life. She also shares about recipes, entertaining and tips. 

Our Grandkids will be here soon...we will decorate cookies, and if I can find the styrofoam balls (Ecokarenlee cover your eyes) we will be making these up.  Three kids and stormy weather calls for some fun crafts to have on hand.  So, I have posted this tutorial of hers for all of us to enjoy.  So,  get this tutorial of implanted in your head.  Collect your scraps and grab the kids. 


Kid Craft: Fabric Scrap Ornaments


This is an easy inexpensive craft for children 5 and up. Both my 5 and 7 year old made one of these ornaments and had no problems. Directions below.

Supplies:
One styrofoam ball - This shows a ball that's 2" in diameter, any size will work

Fabric cut into one inch squares - If you're going to use a bigger ball, I recommend making the squares larger as well.

Embossing tool or tiny screw driver - You don't want to use anything pointy like a toothpick or knitting needle ( it will just poke a hole in the fabric).

  • Yarn
  • Tapestry needle
  • Scissors
  • Knitting needle

1. Poke a hole all the way through the center of the styrofoam with the knitting needle. Thread both ends of yarn trough it. Tie yarn at bottom of ball. Cut loose ends. Refer to picture above.
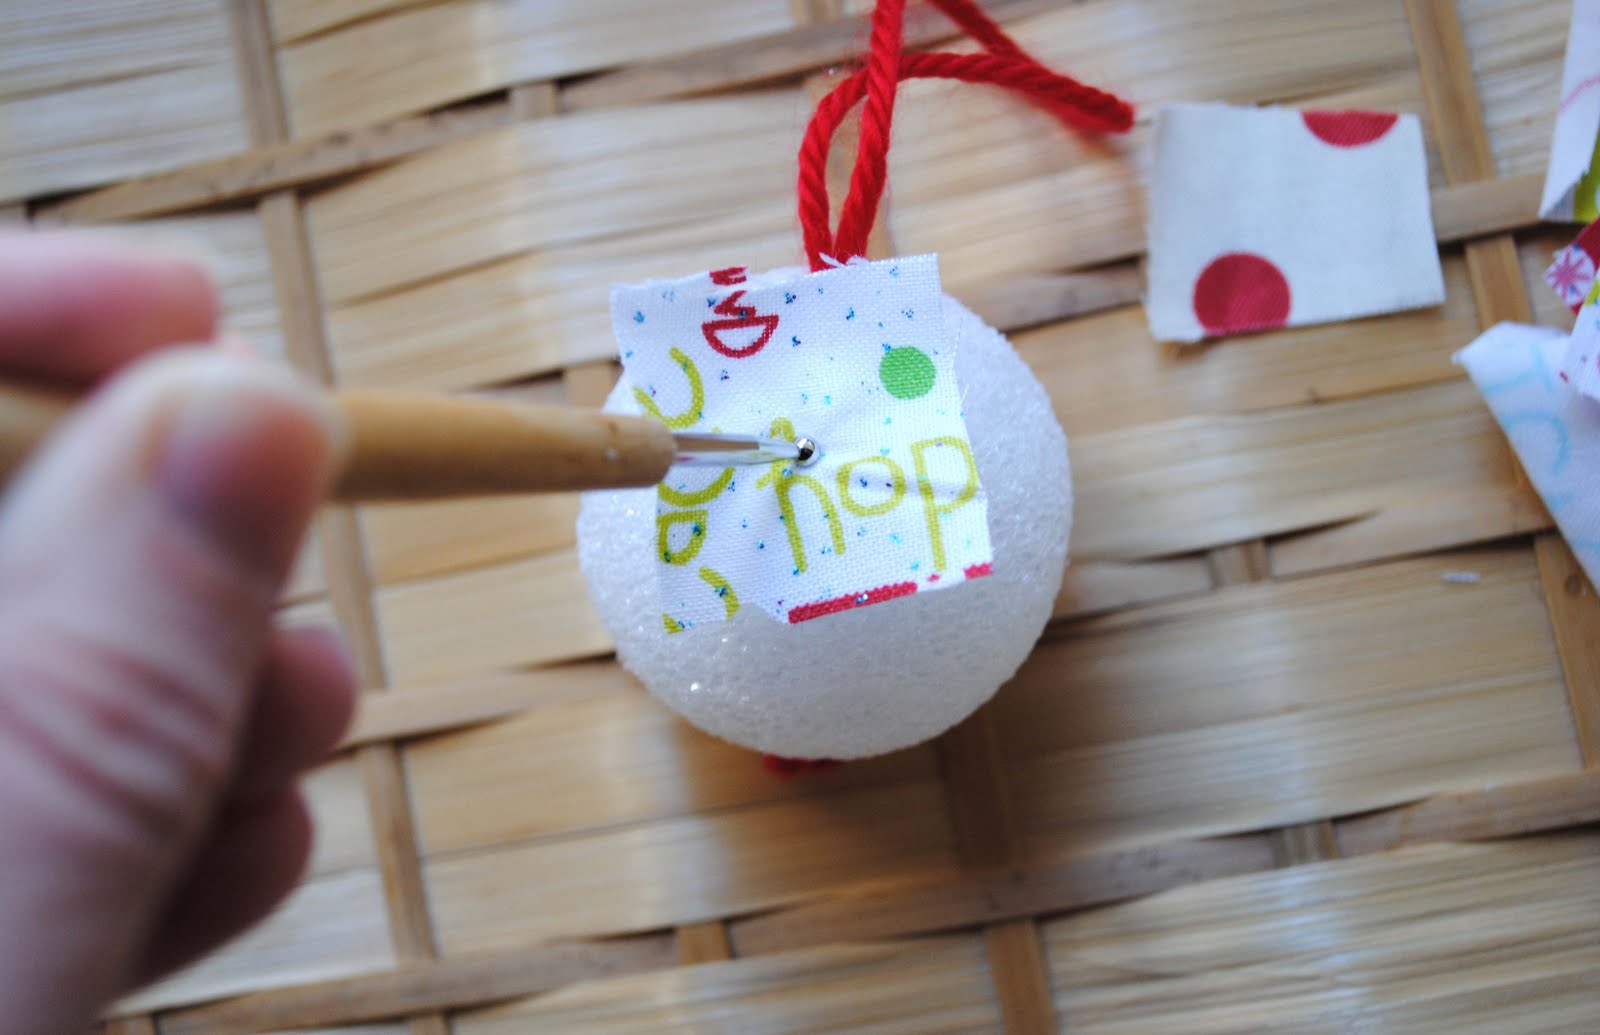
With embossing tool, push the center of the fabric into the styrofoam.

Your ornament should look something like this now.

Repeat process until the entire ball is covered and no styrofoam is showing.

Done!

Jessica has recently been featured in "Glitter Can Add Magic to Holiday Crafting" and "Craft the Bag to Add Something Extra To Your Gifts" for The Associated Press. For a more complete list of articles, click here.

Monday, August 9, 2010

How to make a.......from a......

When I see these words I give 'em a click of the mouse..and a new project is born.

Look around.....there is nothing you can see that wasn't something else before.  Book was a tree, glass was sand, telephone was god-knows-what and rug was chemicals and yuck.  It is presumable (hopefully)  that all these things will one day become something else.  And so it goes. 

Over at Totally Tutorials there is a tut to make anything from anything.  New stuff from old and petty from not-so-petty.  How to take apart and re-use a thrifted garment.  These great projects to add to our never ending lists of wanna-dooos is courtesy of DottyRal.

Sunday, August 8, 2010

I Found Daisy Janie..

New discovery...from my favorite hang out Flickr.....Daisy Janie ...... blog, organic fabric, etsy shop, recipes, tutorials for stuff to make, take and bake. 

oh no you didn't cover fritos in chocolate!


 Oh, yes, she did!

Janie has an organic fabric line that has me drooling.    I need to grab some of her fabrics for the organic bag line in my little corner of etsy...(you know I always leave a link behind).

I am adding Daisy Janie to my blog roll, so check it out.

.....................wondering if I could use tortilla chips instead of Fritos.  Be back with report.

Well, you can...but 'tis a wee bit messy.  Stick with the Fritos!

Monday, April 12, 2010

More on the hexies....a little tutorial

I put some photos of making my hexagons up on Flickr and got a question or two on using the plastic template.  


I  have used both the English paper-piecing method and  the plastic or mylar foundation piecIng.  I  bought  a ton of them back in the day and launched an ambitious Grandmother's Flower Garden quilt top using them..the idea being that you could leave them in the hexies, sew them together to make one 18 hexie block,  press (mylar is heat resistant) then pop them all out.  Start again.  I liked it since there were no basting stitches to remove and no paper to take out. However, I ran out of patience and dumped the whole project some years back.


Then, when Heather  from A La Mode Fabric sends an email asking me to join the hexie group. I found about three or four of them left in my junk.  I wanted to make the pillow that Ashley made.  So I used just one of the plastic joberdoos as follows:  


Do a running stitch around the edge of the fabric. Pull the thread to gather and tie off.  Press using warm iron with a spritz of starch...allow to cool and then pop out the plastic.  Repeat.


Making these little guys is addictive...plus you can put fabric scraps, needle, thread scissors and your template in a zip-lock and drop it in your bag.  Portable hand work is a good thing!

Personally, I would never do it this way for a quilt.  But I wanted a whole bunch of  hexies to put on my pillow.  


Copying Ashley's pillow design, I made my own from scraps from a repro fabric quilt I made. I had an 18" pillow form, so cut a piece of Kona White 20" square, another of batting and two pieces about 20 by 12 for the envelope back. Spray basted the top to the batting and quilted using inspiration courtesy of CharminI 

have a Janome, and it comes with a blind-hem foot. I moved the needle posittion all the way to the left and sort of improvised a 1/8" foot. I sewed all the hexies down with 1/8" allowance all around.  
Made bias binding....put that on and added the backing and voila!  This was fun, fun, fun!


p.s.  I love the way the hexies are all organized in the upper right, then they start escaping and tumbling down.....the symbolism is not lost on me ;)


BTW, all the talented ladies whose work I admire and have mentioned here are listed in my blogroll..over in the right column.  


Monday, March 29, 2010

Free Tutorials...

http://www.freespiritfabric.com/
Anna Maria Horner, Annette Tatum, Denyse Schmidt, Heather Bailey, Erin McMorris, Tanya Whelan, Tina Givens, Valori Wells and on and on....Each fabric line puts out a free downlodable quilt pattern.  Take a look and go to stash and whip up some of these beauties!